A visa photo must match the country, application type and submission stage requesting it. There is no single worldwide visa photo size. A paper print, a digital portrait uploaded to a form and a photograph captured during a biometric appointment are different deliverables—even when they belong to the same application.
This guide explains how to identify the correct requirements, prepare a truthful photograph, check the file and respond to common problems. It includes official U.S., UK, Canadian and German-mission examples, with links to the relevant instructions. It is a preparation guide, not a photo editor or an individual acceptance check.
Official-source review: November 8, 2026. Follow the current instructions for your own application and any specific request from the receiving authority.
Start with the application, not “passport size”
Before taking or ordering a photograph, write down the destination, document name, application stage and receiving office or online account. “Visa photo” identifies a purpose; it does not identify every measurement or appearance rule. A studio’s standard local passport package may be intended for a different document.
| What the application requests | What you prepare | What to confirm |
|---|---|---|
| Printed photographs | Physical copies on the specified photographic paper | Frame dimensions, head size, number of copies and any reverse-side details |
| A digital photo upload | The actual image file in the accepted format | Pixel width and height, file size, framing and permitted preparation |
| A biometric appointment | Attend according to the collection instructions | Whether a separate document upload or printed-photo request also applies |
Keep the official photo page and the application’s own request together. If two instructions appear inconsistent, confirm which one applies with the responsible office. Do not resolve the discrepancy by selecting whichever limit is easiest to meet.
Visa photo size examples: compare the document and stage
The examples below demonstrate why a universal size chart can mislead. Each row identifies the task it describes. They are not a promise that the same specification applies to every application involving that destination.
| Application or stage | Published size or file reference | Important qualification |
|---|---|---|
| U.S. visa printed photo | 2 × 2 inches, commonly shown as 51 × 51 mm | Check the visa category and consular instructions for required copies |
| U.S. general visa digital image | Square, 600 × 600 to 1200 × 1200 pixels; JPEG; no more than 240 kB | The DV entry has its own exact 600 × 600-pixel instruction |
| UK visa/permission digital photo guidance | At least 600 pixels wide × 750 tall; JPG/JPEG; 50KB to 6MB; portrait orientation | Use the visa guidance, rather than a different passport-photo upload limit |
| Canada temporary resident visa printed specification | Frame at least 35 × 45 mm; chin-to-crown head height 31–36 mm | Read the actual checklist; this does not establish one universal IRCC upload limit |
| German missions in the UK: visa photograph example | 35 × 45 mm printed on photo-quality paper | The mission also specifies a photo no older than three months |
References: U.S. visa photo requirements, U.S. digital-image specifications, UKVI digital-photo guidance, IRCC’s TRV specification and the German missions’ UK visa FAQ.
Keep detailed country requirements on the right checklist
For Canadian visitor applications, use our Canada visa photo requirements guide for measurements, route-specific uploads and photographer preparation. A Canadian passport or permanent-residence photo is not automatically the right TRV photograph.
For a Diversity Visa entry, use the separate DV Lottery photo requirements guide. The entry file and later interview prints are different stages. Do not carry a general U.S. digital range into a form asking for one exact size.
The European Commission’s Schengen application guidance calls for an ICAO-compliant photograph. Check the responsible mission’s checklist for the practical submission details. “Schengen” does not mean every European country or every online form shares one JPEG limit.
Millimetres, pixels and KB describe different things
A physical print has dimensions in millimetres or inches. A digital image has a width and height in pixels. Its file size, measured in bytes, KB or MB, depends on the encoded data. Passing one of these checks does not establish the other two.
- Frame size: the outside dimensions of the printed photograph.
- Head size: the required size or proportion of the head inside that frame.
- Pixel dimensions: the digital image’s width and height.
- File size and format: the data amount and actual encoding accepted by the upload field.
For example, a small face placed inside a correctly sized frame can still be unsuitable. So can a sharp portrait saved in the wrong shape. Check the face and the frame separately before changing compression settings.
A conversion example is not an immigration rule
At a chosen print resolution of 300 pixels per inch, a 35 × 45 mm frame converts to approximately 413 × 531 pixels: divide each millimetre value by 25.4, then multiply by 300. This is arithmetic for that chosen resolution, not proof that a visa portal requests those pixels.
Likewise, two inches is exactly 50.8 mm; the familiar 51 mm description is rounded. Follow the authority’s stated format rather than stretching one template into another. A square and a portrait have different aspect ratios, so changing width alone can distort the face.
Changing a DPI label also does not create additional image detail. For an upload, inspect the actual pixel count. For a print, confirm the physical output size and the printer’s scaling settings.
Background, clothing, glasses and expression
Read the destination’s appearance rules before the photo session. The U.S. instructions call for a recent color image, a plain white or off-white background, a full-face view and a neutral expression. The face must remain recognizable and unobstructed; copying a portrait from an identity document is not an acceptable substitute.
Glasses are a clear example of country differences
U.S. visa photos generally exclude eyeglasses, with a narrow medically documented exception. IRCC’s TRV specification allows non-tinted prescription glasses when the eyes remain clearly visible. UK guidance asks applicants to avoid glasses unless necessary and requires unobstructed eyes without glare. Do not apply one country’s rule everywhere.
For head coverings, follow the relevant religious or medical exception and face-visibility requirements. Position the covering before capture so it does not obscure the features or cast unwanted shadows. Ask the photographer to check the original image, rather than promising to correct the face later.
What should you wear, and can you smile?
A visa photo dress code is document-specific. The U.S. instructions specify normal daily clothing and restrict uniforms apart from the stated religious-clothing exception. Advice to choose a color that contrasts with the background is practical photography advice; it is not a universal immigration law requiring one shirt color.
For the examples covered here, use the required plain or neutral expression and closed mouth. Avoid a broad smile when that conflicts with the instructions. Keep hair away from the eyes and check that the shoulders and other required parts of the upper body remain in the frame.
For makeup, prioritize a truthful, recognizable appearance. A beauty filter or digital skin smoothing is a different issue from ordinary presentation. Do not invent a blanket prohibition on all makeup, or assume that an app’s retouching is permitted because a studio offers it.
How to take a visa photo at home
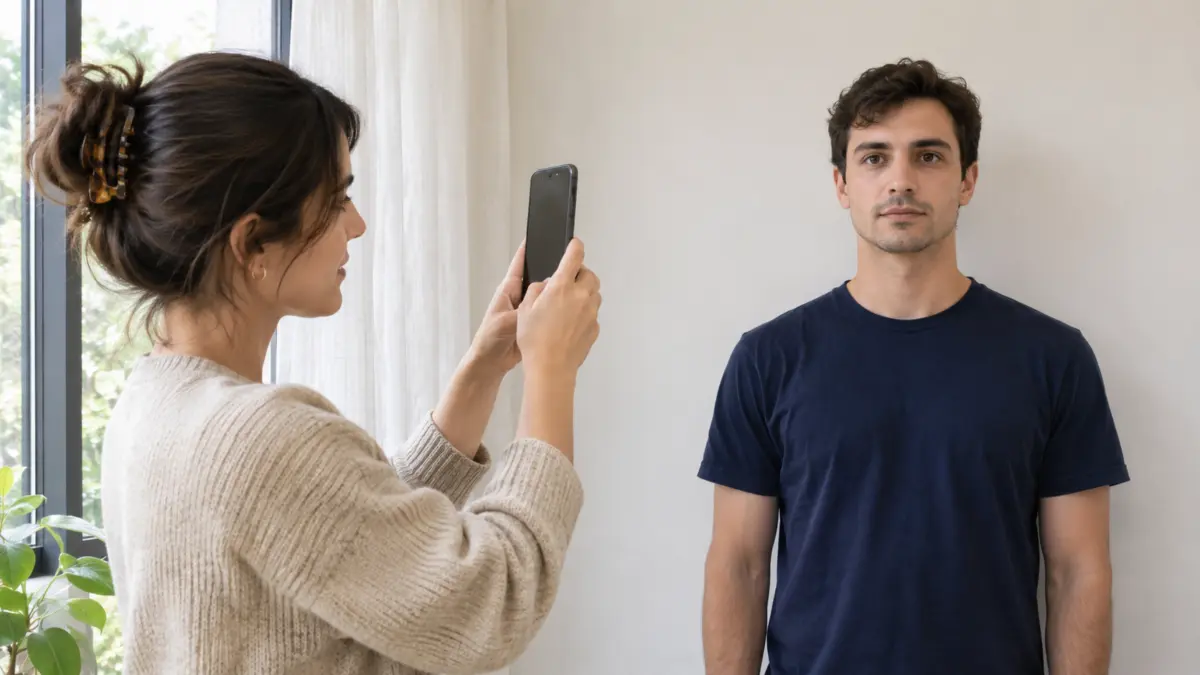
Home capture can work when the application permits it and the result meets the actual quality and formatting requirements. UKVI explicitly allows a phone or tablet photograph and recommends having another person take it. For U.S. applications, the State Department recommends a professional service while allowing self-taken photographs that meet its standards.
- Open the current instructions. Note the document, stage, background, framing and delivery format.
- Prepare a plain background. Remove visible objects from the intended frame and arrange suitable lighting.
- Place the camera at face height. Ask a helper to keep it level and avoid a viewpoint from sharply above or below.
- Arrange even light. Inspect the face and background for strong shadows, glare and red-eye before taking the final image.
- Leave enough original framing. Capture the required head, shoulders or upper body without cutting off details needed later.
- Check focus and expression. Retake a blurred or unsuitable capture rather than attempting to reconstruct it.
- Save the original. Prepare only the file or print version that the receiving application permits.
A front-camera preview can be mirrored; check the saved result and the instructions rather than judging only the preview. UKVI specifically prohibits a mirrored or flipped image. Avoid portrait-mode effects or automatic enhancements that alter the background or your appearance.
Check the original image on a larger screen if possible. Messaging services and screenshots can reduce detail or change dimensions, so obtain the original digital file rather than relying on a thumbnail sent in a chat. Keep the applicant’s files organized without adding names or labels onto the photograph itself.
Visa photo editing: file preparation versus changing the person
A useful distinction is between producing the requested file and changing what the camera recorded. Where permitted, format conversion, proportionate resizing, compression or cropping may prepare an image for delivery. They must not be treated as permission to change the face, remove an obstruction or rebuild a background.
The official U.S. digital guidance specifies JPEG, sRGB color and a compression ratio no greater than 20:1. It also states that the photo must not be digitally enhanced or altered to change appearance. UKVI prohibits alteration by computer software or other means, including filters; IRCC says its digital TRV photographs must be unaltered.
Do not use an AI-generated likeness as your application photograph, or assume that an AI background replacement is accepted. If the real capture has an unsuitable setting, missing detail or an obscured face, a new photograph is the sounder next step. A commercial tool’s output still needs to meet the receiving authority’s rules.
Renaming a PNG or HEIC file to end in “.jpg” does not convert it into JPEG. Use a genuine export or conversion process when permitted, then inspect the result. Keep a separate original so repeated compression does not become your only remaining copy.
Babies and children: check the specific exception
A child needs the requested photograph too, but age-related relaxations differ. UK guidance says children under six need not look directly at the camera or maintain a plain expression, and children under one need not have their eyes open. A supporting hand must not appear in the image.
Do not extend those UK exceptions to every visa application. The U.S. visa photo FAQ asks for the child’s eyes open and no other person or supporting hands in the frame. It suggests a plain sheet to support a baby while avoiding shadows.
Allow time for another attempt rather than holding the child in a way that leaves a visible hand or object. Check the chosen authority’s instructions for the child’s age before booking a service or preparing the file.
What to tell a photographer or print service
Bring a short written brief instead of asking only for “passport photos.” Confirm that the provider can produce the actual document format and the deliverables you need. Taking the picture, supplying the original digital file and producing correctly scaled prints are separate services.
| Tell the provider | Record before leaving |
|---|---|
| Destination, document and application stage | The exact specification being followed |
| Official instructions and any personalized request | Whether a local-office rule adds anything |
| Print dimensions and head-framing requirements | The measured output, with no unintended borders or scaling |
| Digital format, pixels and file-size limits | The actual delivered file properties |
| Restrictions on enhancement or background replacement | An original, truthful capture and any permitted preparation |
| Copies, delivery method and replacement terms | What the quoted price includes and how a correction is handled |
For printing, follow the specified photographic-paper requirement. A correct image printed on an office sheet is not the same deliverable. Check whether the print dialogue has applied “fit to page” or another setting that changes the intended photo dimensions.
Ask for an itemized price if you need both prints and a digital copy. A named retailer’s photo service may vary by branch and document; a familiar store name does not establish that its default package matches your application.
Visa photo rejected or upload failed: identify the type of problem
Separate a technical upload failure from an authority’s request for a replacement photo. A file can upload successfully while failing the visual requirements. Conversely, an acceptable-looking image can be rejected by a form because its actual format or dimensions are wrong.
| Problem | Check | Next action |
|---|---|---|
| Unsupported format | The actual encoding and the field’s accepted formats | Obtain a permitted export; changing the extension is insufficient |
| File above the limit | The finished file’s bytes and the stated maximum | Prepare a compliant version without destroying the required quality |
| Wrong dimensions or shape | Pixel width, height, aspect ratio and required framing | Work from the original; do not stretch the face |
| Blur, shadows or hidden features | The original capture, not only a small preview | Retake when necessary rather than digitally reconstructing it |
| Wrong person or wrong application stage | Applicant, file selection and document field | Select the correct file and recheck the instructions |
| Official replacement request | The requested correction, deadline and submission channel | Follow that request and retain the confirmation |
A specific DS-160 confirmation-page example
The State Department’s photo FAQ explains that an “X” instead of the photo on a DS-160/DS-1648 confirmation page means the upload failed. It instructs applicants to provide a compliant printed photo with the confirmation page and contact the responsible embassy or consulate for the specific procedure. Do not invent the same remedy for every country’s portal.
If you receive an unclear technical message, record the wording, application field, file format, dimensions and size before seeking official support. Do not post your passport, application number or face image publicly to troubleshoot an upload.
Your final visa photo check
- The instructions match the correct destination, document, office and stage.
- The image is current enough and still represents your appearance.
- The face, background, expression and permitted accessories meet that specification.
- The frame, head size and digital dimensions have been checked separately.
- The delivered file has the right actual format and permitted data size.
- The correct applicant’s file or copies are selected, and any submission confirmation is retained.
Technical checks and visual checks work together. A correct pixel count, a commercial “passed” badge or a successful upload is not a government acceptance decision. If the authority asks for a new photo, address the request rather than relying on the earlier tool result.
Frequently asked questions
Is a visa photo the same as a passport photo?
Not automatically. The destination, document, application stage and photo age must all match. A photo prepared for one passport service may have different dimensions, file limits or appearance rules from a visa request.
Is every visa photo 2 × 2 inches?
No. That square format is a U.S. example. Other applications use portrait formats or their own digital dimensions. Start with the exact application instructions rather than a universal template.
Can I take my own visa photo on a phone?
Where the route permits it, a suitable phone capture may work if it meets every requirement. A helper, level camera, clear original image and suitable lighting help. Permission to use a phone does not waive image-quality or appearance rules.
Can I wear glasses in a visa photo?
Check the specific destination. Some rules generally exclude them, while others allow clear prescription glasses when the eyes remain visible. Do not assume a rule from an earlier application applies again.
Does an online checker guarantee acceptance?
No. A tool may check dimensions or other properties without resolving every requirement. The receiving authority decides acceptance. This guide does not inspect or approve individual images.
Does a photo problem automatically mean my visa is refused?
A technical failure or photo-replacement request is not the same event as a final visa decision. Read the actual message, follow the specified remedy and deadline, and contact the responsible authority if the instructions are unclear.